You’ve probably got a cell phone with a camera on it. Here are 5 great tips to improve your cell phone photography!
I’ve recently moved country (bear with me!), and that meant my cameras have spent far too much time packed away in various boxes. So, ever the snapper, I’ve been taking far more cell phone photos than usual. Which made me think a bit more about how to take good mobile phone photos.
Cell phone photography, or mobile phone photography if you prefer, is quite likely the most common form of photography there is these days. And the reason is obvious – most people carry a cell phone (and consequently a camera) everywhere with them.
And that means they have a camera at the ready all the time. Here’s 7 tips that will help you take better cell phone photos.
Cell phone photography tip 1 – adjust phone settings
 The key to any good photo is a good quality starting image.
And with cell phone camera image sensors being on the small size, that’s even more important.
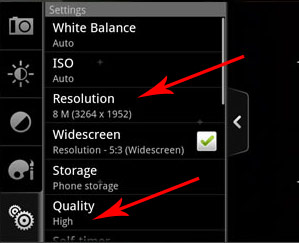
So, the first thing you need to do is explore your cell phone’s camera menu and access the ‘resolution’ setting and the ‘quality’ setting (arrowed in the photo here)
Resolution first – set this to the highest available. Resolution is how many of the camera’s pixels you want the phone to capture. If you choose not to use all the pixels available you’re wasting what could be valuable image data.
Next, quality – the quality setting determines how much you want the image compressed.
Compression is when image data is taken from the image sensor, a computer chip (in this case, the one inside your cell phone) then strips out the bits of image data that it thinks you won’t miss, and then records the remaining image data as a JPEG file.
The advantage is that the JPEG is a much smaller file size. The disadvantage, especially if you’re after the best image quality, is that you’re throwing away image data again.
So, first tip – set your cell phone camera settings to record the highest quality possible.
Cell phone photography tip 2 – learn how to keep the phone still
 All the quality and resolution settings in the world won’t help at all, unless you know how to hold your phone steady. Wobble that phone around while you stab the screen and you’ll be lucky if anything comes out in focus.
And it’s not as easy as you might think.
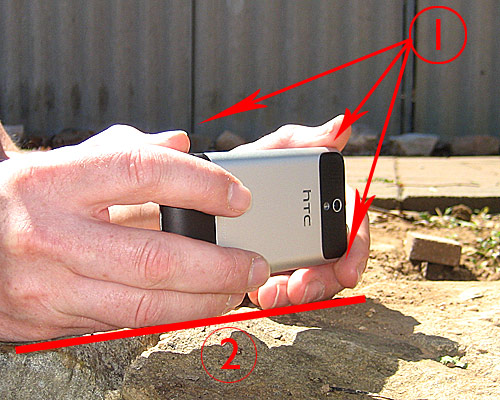
There is something of a technique involved and the main thing is to brace your cell phone as best you can while you take the photo.
Like in the photo above, hold your cell phone with your thumbs and fingers bracing a corner each (see arrows in photo above). Then, if possible, rest your hands on a solid surface (shown by the red line in the photo above where a wall was used).
The reason why this is important is that, with cell phone photography, the camera is less sensitive to light than a traditional camera. And that means shutter speedsare lower. And the consequence of that is that it’s far easier to blur photos than with a regular camera. 
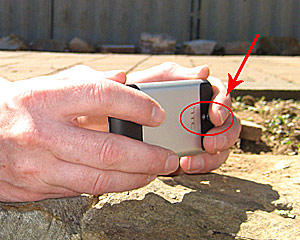
One final tip with holding your phone – remember not to hold your finger over the lens!
You never think you will, but someday, all of us end up forgetting where the lens is, especially on cell phones, and what do we get?
A nice photo of your own finger!
Cell phone photography tip 3 – avoid using the flash
 I would say that, even with normal digital photography, it’s almost always to take photos with the flash off rather then on.
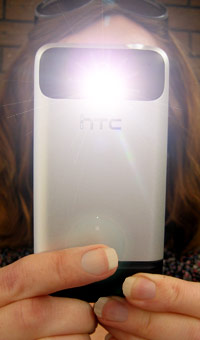
With cell phone photography it’s even more important because the flash is even weaker than those on cameras. You end up with really bad flash fall off.
If you turn on the flash you end up with a spot in the middle of the photo that is overexposed, a ring just outside that central area where the illumination looks about right, and then the edges of the photo where the flash didn’t reach.
As I already mentioned, the effect is worse with cell phones than with cameras, so what should you do?
Turn off the flash (using your cell phone’s settings), and then hold the camera still – see tip above.
Do this, and you’ll end up with much better lighting.
However … having said all that, be warned that, although this works well for subjects that are reasonable stationary, for other subjects, unless you can get them to hold still, you’ll end up with nothing but a blur – which could be artistic, but will probably just look like a blurry mess!
Cell phone photography tip 4 – keep the lens clean
With cell phones, more than with cameras, their ability to attract fingerprints is second to none.
The poor things spend half their day being handled, and none of them have anything covering the lens.
Add all this up, and the potential for a dirty lens is pretty high.
If you do end up with a dirty lens the quality of your photos will really drop. So, do yourself a favour, break out the q-tips, and give your cell phone camera lens a good wipe!
Cell phone photography tip 5 – use apps

A while ago I would have never recommended you use photo apps.
However, things have moved on. Now there are some amazing cell phone photography apps that can really add a dash of spice to cell phone photos.
This is a trend that I only see only improving more over time. A while ago the best you could get was an app that would make everything black and white, or sepia.
Now, there are a plethora of apps that will quickly and easily create the sort of effects that used to take a lot of complicated steps in Photoshop to achieve.
There are some photo purists who think you should never edit a photo. Fair enough, that’s their choice. If I were you, I’d give the apps a try and if you like the look, go for it!


